How to Miter a Quilt Border April 24 2014
Many quilters have a hard time making that perfect mitered border. This tutorial will give you all of the elements needed to make an award winning miter. We hope you enjoy it!

Watch how to Miter a Quilt Border
Step 1
It is always a good idea to square your quilt top before adding the borders. Sew the borders on the opposite sides of the quilt, leaving enough fabric on the ends so there will be fabric extending to the location of the outside tip of the border corner. The seams of these borders should go right to the edge. Next, add the other two border sides that meet the first borders at 90 degrees.

Step 2
This may be the most important part of the process. This second border must come right to the very edge or stitches of that first border, not one stitch over and not one stitch under. This will allow that miter to meet right at the corner.
Step 3
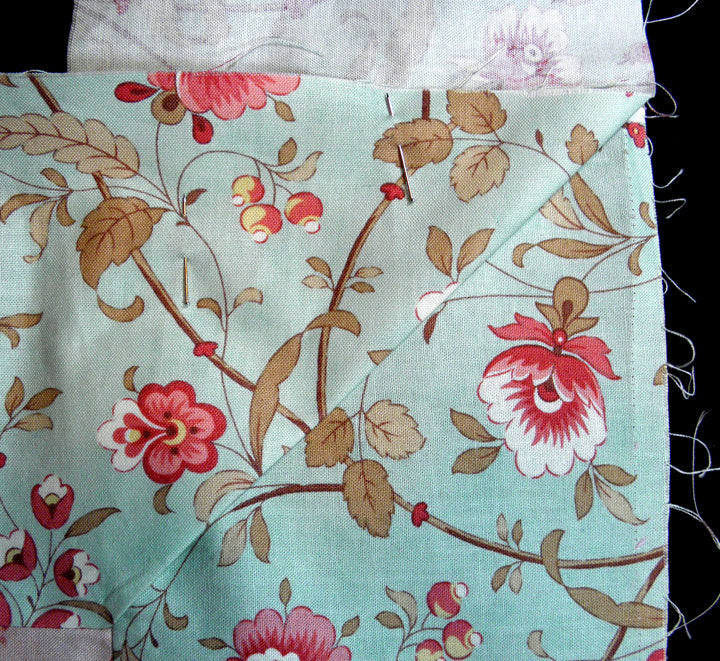
Fold out the miter so the fold will start right at the corner of the quilt top. As that border folds under, the fabric beyond that fold will line up with the extra border fabric of the other border. Once this is carefully aligned, press the fold so it is well creased. The pins shown in this picture need to be moved to the fabric of both borders that are beyond the fold.

Step 4
Without letting the position of the folded miter move, open it up so the borders align on the edge and are right sides together.

Step 5
Pull the seam allowances back so the crease line is exposed to the exact point of the quilt top. This is the point that was so carefully sewn where the two borders met not one stitch more or not one stitch less, remember. That creased line will become the sewing line.

Step 6
Put the needle down right at that exact corner and let the needle stitch in the same hole twice before moving forward toward the outer corner. Remember to not let the fabrics shift from that original folded position.

Step 7
Check that the miter is perfect. Trim the extra fabric out of the seam, leaving 1/4" seam allowance.
